Homemade natto
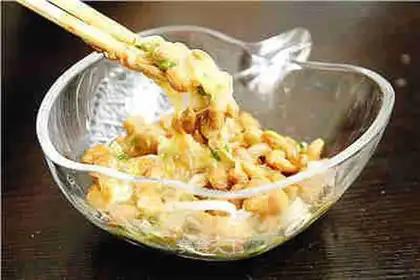
Make your own fresh Japanese natto at home
Recipe Recommendations
- soybean 400g
- Bacillus natto 0.1g
Steps for Homemade natto
1
Select 400 -500g of soybeans (only use good plump grains), wash them with water, soak them in more than 3 times of water overnight (4-8 hours in summer and 8-16 hours in winter), drain for later use.2
Add a lot of water to a pressure cooker or steamer, place it on a steaming rack, spread a wet drawer cloth, spread soybeans evenly on top, and cover the lid. Starting from when the pressure cooker pressure reducing valve deflates, the heat is high for 5 minutes and the heat is low for 45 minutes. If it is a steamer, the edges and air holes of the lid should be sealed with a wet drawer cloth. If the fire burns until it is full of air, the fire will be heated for 20 minutes, and then the fire will be changed to medium to medium for 1 hour and 20 minutes. During the process, don't let the drawer cloth on the lid dry. You can add a few drops of water several times to moisturize. After turning off the fire, don't open the lid. Stay stuffy for another 20 minutes. (Standard for cooked soybeans: squeeze them with your hands) Remove from the pan and place them in a clean (water-free and oil-free) container to dry at 80 degrees, and quickly take the next step.3
Dry 10ml of boiled boiled water to 40-50 degrees, add 0.1g of Bacillus natto, stir quickly, pour into soybeans at 60-75 degrees, and stir well. (I took the soybeans out of the pan and placed them in a large crisper box, added diluted natto water and immediately covered the lid, and shook well to keep warm and even)4
Quickly divide the soybeans into several small fermentation boxes (the ones with holes in the lid) of the yogurt maker and cover them tightly. Put the soybean box into the yogurt machine (at this time, the soybeans should not fall below 45 degrees), use plastic wrap instead of the cover of the yogurt machine and seal it tightly first. Use chopsticks to poke a few small holes in the plastic wrap (to avoid lack of oxygen), and put the cover of the yogurt machine. Use a chopstick to cover it, leaving only a small gap.5
Place the yogurt maker in an environment below 25 degrees, power on, and follow the instructions of different yogurt makers to set the working status of "making natto" and the time-24 hours (16-18 hours in summer and 20-24 hours in winter).6
When taken out of the pan, there is a white film on the surface of the soybeans. Stir it and extremely rich sticky threads appear. The natto was successfully produced (haha... Snickering...). Let cool, seal in small bags, store them in the refrigerator and freeze them. Thaw them naturally before eating.Homemade natto Make Tips
1. I use the "Japanese Takahashi Natto Starter" and the "Yikang Yogurt Maker with its matching small fermentation boxes," which are sold on Taobao. If you use other brands of natto bacteria and yogurt makers, please adjust the dosage and usage according to the instructions.
2. During the trial process, I didn't think to take photos, and my finished product has already been frozen, so the images above are sourced from the internet.
3. Select 500g of raw soybeans; after discarding any damaged beans, this will yield approximately 1.8-1.9 jin of fresh natto. I am mentioning this to say that if you want to eat it regularly for health reasons and have time to make it yourself, it is much more cost-effective than buying it from the supermarket.
4. The method listed above is a summary combining "the seller's provided instructions" with my own making process. I hope this offers a little help to friends who want to give it a try.