Sculpt radish
By VicentaLakin
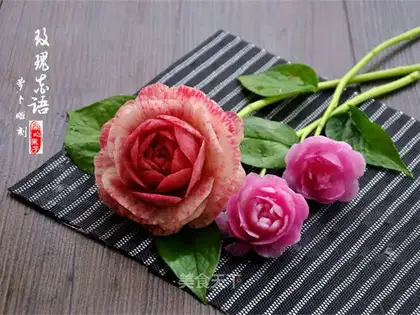
Are you surprised? At first, you think it's a real flower? How can you add flowers to your food sculpture, which you've made? In addition to being busy making all kinds of child foods, there has been a strong interest in decorating flowers and carvings. There has been a long desire to try the carrots, and it has often been seen in the street alleys by vendors who push cars to sell their hearts for radiant carrots. It's amazing that I've always stood in front of the stand and looked at the carrots for half a day, and I didn't know where to do it. It's spring. There's a lot of cheap red carrots. I'd like to get some red carrots first. And I didn't have a sculptor knife, and I couldn't wait to start sculpting carrots for the first time from home, and I didn't know how to sculpt them, and it was a good sculpture. I can't believe it's not broken. I think that better ways than sharing them are more meaningful. However, it's hard to understand the graphics, and some of them need to be summed up over and over again to understand the techniques. My engraving methods are carved from the outside, and you can learn your skills slowly by following the methodological steps. Come on, let's move
Recipe Recommendations
- All kinds of fresh radishes can be used several
- utility knife a
- Purple cabbage juice a bowl
- white vinegar few drops
Steps for Sculpt radish
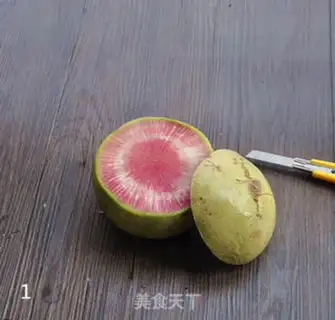
1
Cut the radish from under one half to two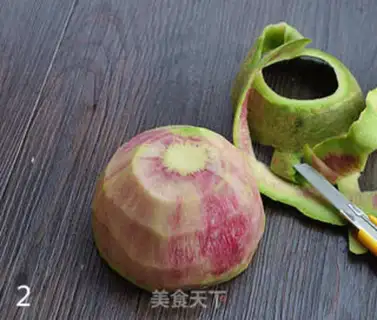
2
The radish scratches its head off, looks like a gyro, but doesn't have to be too sharp, leaving a small amount of comment, because it's the bottom of the radish, and it's easy to put it. Steady. When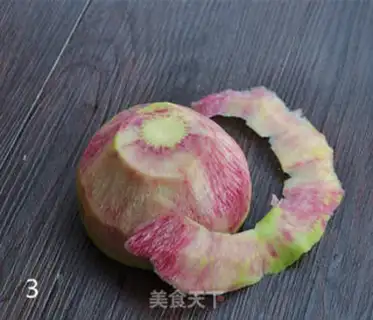
3
Keep going along the edges and cut the edges of the mid-tummy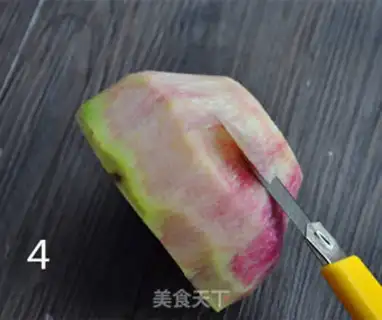
4
Cut the tail a little more round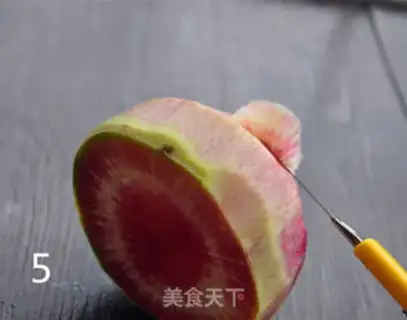
5
The first petals were carved on the first floor, and the petals were actually at the bottom of the petals, so each one would have to be cut bigger, and it would have to be cut slowly to prevent the hand being cut too quickly and the radishes being cut off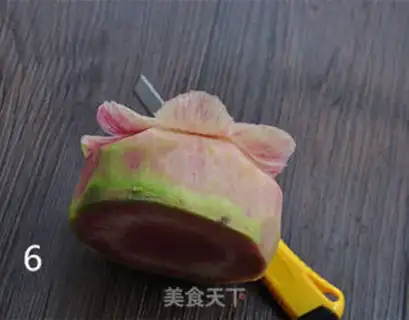
6
A smooth one-week rotation, with multiple petals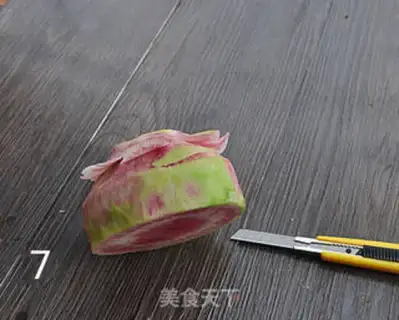
7
Triangulate the first round between the petals by cutting into drums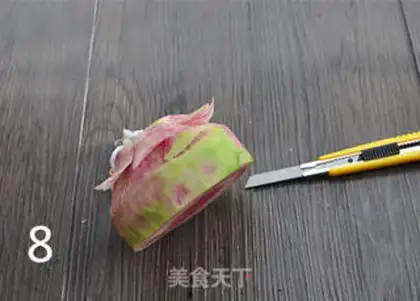
8
Remove all the excess edges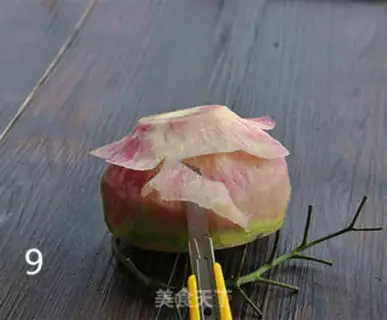
9
Cut a thin skin along the edge, not too thick, just to make it smoother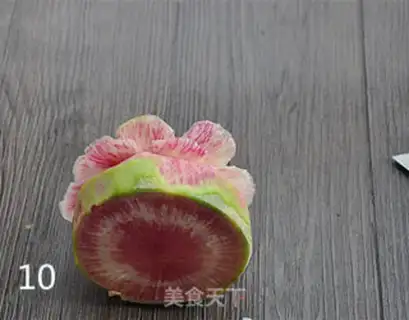
10
The petals of the second layer will be cut, and each petal of the second layer will be carved between each of the two petals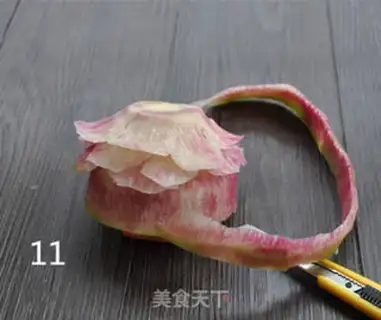
11
Like the first one, when the petals are engraved, the same way, the trigonometry between each of the petals, then the thin skin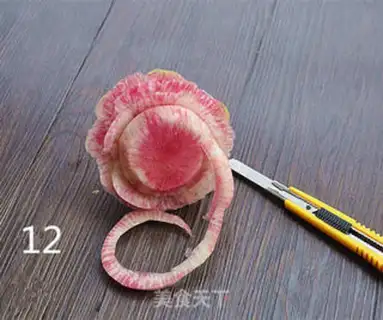
12
So, every time a circle of petals is engraved, the excess of the elliptical angles is cut out to form a smooth circle, each of which is too thick, too thick to break, and each layer of petal is smaller and shorter than a circle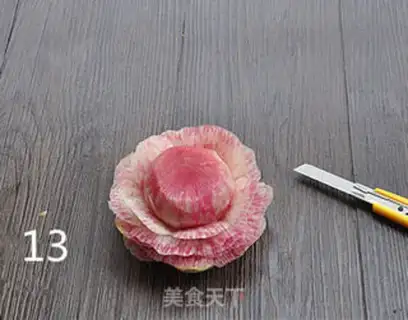
13
Get to the part of the radish heart and rip out the sharp edges again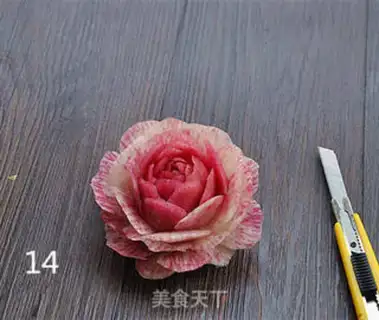
14
This way we're going to go round and round and round and round and round, until we're done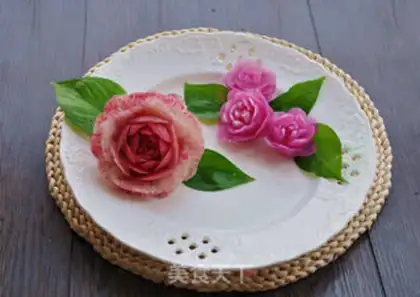
15
I'd like to see the radials cut with the green leaves for my favorite palette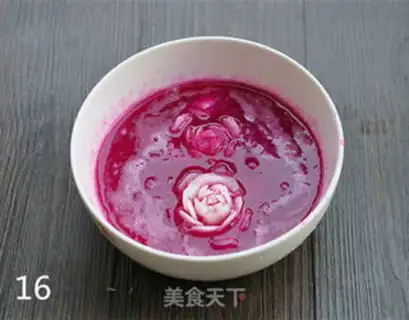
16
In the case of white radish or red-skinned radish engraving, it can be engraved after it has been engraved with a few drops of vinegar immersed for two or three hours, which would make the color more attractive. If not urgently used, engraved carrots can be placed in a bowl with water to soak in a beautiful flower. Take it out when you need it. The shorter the bubble time, the lighter the color of the flowers, but not for two or three days when it's hot。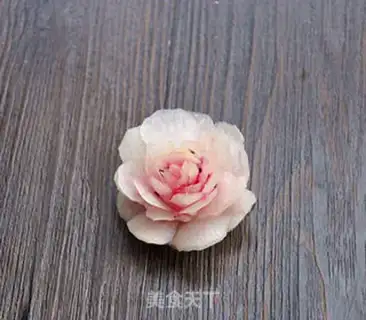
17
It's a short-duration flower, light-coloured, and it doesn't smell like it. Physical engraving can produce beautiful radishes with skill and skill. Let's try it