Cheese moose
By VicentaLakin
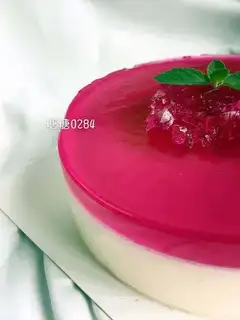
Recipe Recommendations
- light cream 125g
- marshmallow 80g
- mascarpine cheese 80g
- plain yogurt 125g
- gelatin powder 10g
- ice water 30g
- sweetening
- roast
- several hours
- ordinary
Steps for Cheese moose
1
Muslied glittin powder mixed with ice water for five minutes, then the insulated water melted, and then evened with hot yogurt2
Six inches of original mold wrapped in tin paper and a piece of cake on the ground floor3
cream cream with a little bit of fluff marshmallow mixing, a little bit of cooling, until marshmallows are better integrated into light cream4
It's just a tattoo5
Add the mascarpone cheese, a slight mix, and hit it with an eggbeater for about 5 to 10 seconds6
Scan full milk powder, slightly evenly mixed7
The yogurt mixture that was made before it went down was even8
It's better to mix the flat moose, to hold on to it, to get past the slag, so the scared relatives, don't use the electric omelet9
Moose put a piece of cake in the mold before he fell in and put it in a freezer for more than three hours10
frozen portion: 8g of glitting powder mixed with the iced australian cocktail in 24g formulation for a couple of seconds, and the insulated water melted into the balance of the rheumatian cocktail evenly (early return to temperature, must be constant)11
Pyramid slices are thrown into the rhesus cocktail mix to make it thaw12
The color of the flamingo leaks into the bottle, and then it goes straight into the frozen mousse surface and then into the fridge. Two or three hours later, tear out the tin paper, blow a moose circle or a hot towel13
Done14
DoneCheese moose Make Tips
1. The glitting must be mixed with ice water for a few seconds before the insulated water melts, and remember that it must be mixed with liquids that are warm and cannot fall into frozen liquids, otherwise it is easy to create particles and affect taste! Two, the Moose Circle wraps the tin paper, and better put a slightly larger bottom-up top up for plasticization and operation