Often buying snacks to stock the office, spending a lot of money and harming your health? Try making your own snacks at home on the weekend. They are healthy, delicious, and a great way to pass the time.
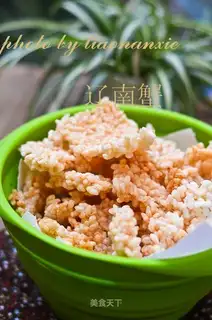
Homemade Crispy Rice
Five-Spice Crispy Rice
Ingredients: A small bowl of rice, salt, five-spice powder, shrimp powder, cooking oil as needed
Instructions:
1. Add a little salt to the rice.
2. Add a little five-spice powder.
3. Add half a spoonful of shrimp powder, which can enhance the flavor and add calcium.
4. Add a little cooking oil and mix well with your hands. Adding oil prevents the rice from sticking to the pan during frying.
5. Take a piece of plastic wrap and place it on a cutting board. Put the rice on top.
6. Fold the plastic wrap in half and roll it several times with a rolling pin until the rice is crushed a bit, which helps it hold its shape. Roll the rice into a thin sheet and refrigerate for 30 minutes.
7. Take the refrigerated rice sheet out of the fridge, remove the plastic wrap. The rice from the fridge is not sticky and easy to shape.
8. Use a knife to cut the rice sheet into even strips.
9. Cut the strips into small squares. Make sure to separate them; do not let them overlap, or they will stick together.
10. Brush a little oil on the electric griddle. You can also use a flat-bottomed pan or an oven to bake them.
11. Put the cut crispy rice into the electric griddle.
12. Fry one side until golden brown, then flip it over. Fry until both sides are golden brown.
Fried Rice Cakes
Homemade Fried Rice Cakes
Ingredients: 300g glutinous rice flour, 75g maltose, 200g water, granulated sugar, roasted white sesame seeds as needed
Instructions:
1. Pour the maltose into a pot. Using maltose will make the inside of the fried rice cakes have a honeycomb-like texture after frying.
2. Add 200g of water.
3. Bring the water and maltose to a boil over high heat.
4. Put 2/3 of the glutinous rice flour into a basin. Pour the boiled maltose water into it while stirring continuously.
5. Add the remaining 1/3 of the dry flour. Adding the flour in two batches makes the fried rice cakes crispy.
6. Knead into a smooth dough with your hands.
7. Use a rolling pin to roll the dough into a sheet about 5mm thick.
8. Cut into strips about 5mm to 1cm wide.
9. Roll each strip into a small round rod with your hands.
10. Cut into even small pieces, about 5cm long.
11. Pour appropriate amount of oil into a pot.
12. Put the small pieces into the cold oil and fry over low heat slowly (remember, they must be put into cold oil).
13. As the oil temperature rises, the rice cakes will slowly float up. Gently stir with chopsticks to prevent them from sticking together.
14. When the surface is slightly yellow, turn them over with chopsticks to ensure even heating. The whole process should be over low to medium heat.
15. After about 5 minutes from being put in the pot, the surface of the rice cakes will be golden brown. Remove and drain the oil. Continue frying the remaining rice cakes. Do not put them directly into hot oil. Turn off the heat, let the oil cool down, then put them in.
16. For the fried rice cakes, while they are still hot, first coat them with granulated sugar (this step can also be replaced by making a syrup and coating the rice cakes with it).
17. Then coat them with white sesame seeds. Coat all the fried rice cakes with sugar and white sesame seeds.
18. Spread the coated rice cakes out evenly and let them cool. They are ready to eat. Any leftovers should be stored in an airtight container.
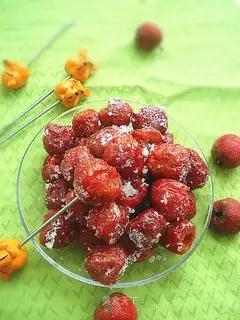
Hawth Jelly
Homemade Hawth Jelly
Ingredients: 500g hawthorn, 60g sugar (you can add more sugar if you like it sweeter)
Instructions:
1. Put the hawthorn in water and clean the surface with a steel wool ball. Remove and rinse.
2. Take a clean hawthorn and place it on a cutting board.
3. Cut off one end with a knife.
4. Cut off the other end as well.
5. Use the end of a pen or chopstick to poke through the hawthorn.
6. The pit will be removed.
7. Remove the pits from all the hawthorns in the same way.
8. Put the hawthorn in clean water, add a spoonful of salt, and soak for 30 minutes (soaking in salt water helps to set the color, so the cooked hawthorn can maintain its beautiful color).
9. Put an appropriate amount of cold water in a pot, put the soaked hawthorn in, and start cooking over medium heat.
10. After it comes to a boil, add half of the sugar, saving the other half for later.
11. Cook until the hawthorn is slightly plump. Do not cook for too long, or it will become mushy.
12. Remove the cooked hawthorn from the pot.
13. Sprinkle the remaining half of the sugar on top. This allows the sugar to seep in, making it sweet and sour from the inside out.
14. Mix the sugar and hawthorn together.
15. Put it in the microwave and cook on high for 10 minutes.
Double Skin Milk
Hong Kong-style Dessert: Double Skin Milk
Ingredients: 500ml milk (the kind in a carton, like Bright brand, is best; it shouldn't be too thin), 2-3 eggs, sugar to taste (it's recommended to add more sugar)
Instructions:
1. First, divide the milk into 2-3 small bowls and add sugar to stir. If you use two bowls, there will be some milk left over, which you can save for making cappuccino foam.
2. Heat the small bowls in the microwave for 2 minutes, then let them cool. Take a large bowl, separate the egg whites, and add sugar to stir.
3. After the milk has cooled, gently lift the milk skin. Pour all the milk from the small bowl into the large bowl with the egg whites. When you're done pouring, the milk skin will sink to the bottom of the bowl. Be careful not to break the milk skin.
4. Stir the egg whites and milk together until well combined. Then pour the mixture back into the small bowl where the milk skin is. The milk skin will slowly float back up.
5. Steam the milk in a steamer over boiling water for 10-15 minutes. It's best to cover the bowl with plastic wrap.
6. After steaming, let the milk cool. Another layer of milk skin will form, which is the "double skin" of the dessert. Double skin milk has a delicate and smooth texture. You can eat it hot in the winter. If you want to, you can add raisins, red bean paste, sweet osmanthus, or even mashed fruit like banana to make it fruity. In short, be creative based on your own taste!
Notes: The egg whites must be beaten well. There's a trick to separating the egg whites: crack the eggshell and make a small hole, then let the egg white slowly leak out into the bowl.
Sachima
Sweet Potato Sachima
Ingredients: 1 sweet potato (about 500g), 1 egg, 50g flour, 50g rock sugar, roasted white sesame seeds, a little butter
Instructions:
1. Wash, peel, and grate the sweet potato into thin strips (you can also cut them; the thickness depends on your preference. I grated them a bit thicker). Crack the egg into a bowl and beat it. Pour the beaten egg over the sweet potato strips and mix well.
2. Add the flour. Use your hands to mix the sweet potato strips and flour evenly, ensuring each strip is coated with flour. Pour oil into a pan (about twice the amount you would normally use for stir-frying; the sweet potato strips won't absorb too much oil). Fry the sweet potato strips in batches. By the time the sweet potato strips are all fried, the oil will be used up.
3. Heat the oil over medium heat until it's about 70% hot. Add a handful of sweet potato strips and fry until they are golden brown, then remove. Continue frying the remaining sweet potato strips in batches until they are all done.
4. Take a heat-resistant container or baking tray, coat it with a little cooked oil, and sprinkle a small amount of roasted white sesame seeds on the bottom. Put the rock sugar in a pot, add a small bowl of water, and melt it over high heat. Once the sugar is melted, reduce the heat to low and add the butter.
5. Next, slowly simmer the syrup until it becomes thick and viscous. The standard for a well-made syrup is that you can dip a chopstick in it and pull out a thin thread. Once it reaches this point, turn off the heat. While hot, add the fried sweet potato strips.
6. Also sprinkle the white sesame seeds into the pot and mix quickly to ensure every sweet potato strip is coated with syrup. Quickly pour the syrup-coated sweet potato strips into the heat-resistant container. Use a spatula or your hand (dipped in water) to press them down firmly. Let them cool completely before removing from the mold and cutting into small pieces.
Banana Chips
Banana Chips
Ingredients: 2 bananas, fine sugar as needed
Instructions:
1. Slice the bananas thinly. Choose the freshest, firmest bananas (do not use unripe ones, as they will be astringent). Slice them as thinly as possible. Homemade banana chips have a different process from factory-made ones, so thinness is key to their success.
2. Arrange the slices on a non-stick baking sheet.
3. Sprinkle a layer of fine sugar on the surface. Remember to use fine sugar, not powdered sugar or coarse sugar, as it will affect the texture. Although bananas are already sweet, fine sugar helps the final product become crispy, so just a thin layer is enough.
4. Bake in the oven at 100°C on the upper rack for about 30-40 minutes. However, this depends on the actual situation. If they still feel soft and sticky, continue baking. Since this is a low-temperature bake, it doesn't use much electricity. If your oven has a convection fan, turn it on to speed up the drying process. Bake until the surface is no longer sticky and the chips hold their shape. Then, lift them from the baking sheet—you'll see they are now thin and crispy.
5. Transfer them to a wire rack and continue baking at 100°C on the middle rack for about another half an hour. When you put them on the wire rack, they will soften slightly because one side was against the baking sheet. This step ensures both sides are dried evenly. Bake until both sides are dry and feel distinctly crisp and formed. If they are not done after the set time, add a few more minutes. It's a low temperature, so they won't burn.
6. After taking them out of the oven, let them air-dry. They are at their crispiest when completely cool. If you don't plan to eat them right away, store them in a dry, airtight container. Take them out as needed to maintain their crispiness.
 egg noodles
 The mountain
 Homemade pan
 Tacos
Tacos White toast
 Garlic Spill